GROUP Shadowwall
The Idea
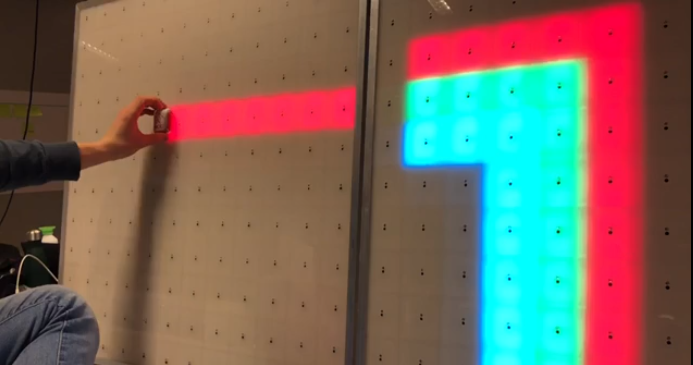
Our Programme Coordinator wanted a device which would be interactive with the students. We came up with the idea to make a ‘Shadowwall’. Basically its a large LED-panel divided up in smaller squares. In each square an infra-red sensor is mounted. When a sensor is activated, the square is lit up.
Specifications
One panel is:
- 80x80cm
- Divided up in 144 little squares with 4 LED’s each.
- Modulair, you can connect multiple panels.
Functionalities
The panel has multiple built in functionalities, or so called ‘modes’. One of them is being able to draw, with a white reflective surface as a pencil, you can hover infront of a square and it lits up. And with 144 squares at your disposal it possible to draw. When you are bored and dont want to draw anymore there is the option to play a game, Whack-A-Mole. Activating the sensor whith the lit up square as fast as possible. When no one is around to play or to draw there is a rainbow mode, this mode fades across the colors of the rainbow resulting in a relaxing scene.
Components
For this idea to work we needed the following components for 1 panel.
Hardware
- 3 Arduino Mega’s
- 576 Led’s
- 144 IR-sensors
- Raspberry Pi (3B)
- 1 Arduino Uno, it controls the potentiometers so the user can choose the color.
If you want to make another panel, you only need the Mega’s, LED’s and IR-sensors. The Raspberry Pi is the main controller, it controlls the ledstrip.
Working of the panel
Every microcontroller is connected with eachother through I2C, with the Raspberry Pi as the master. When a sensor is activated the slave (Arduino Mega) sends the id of the activated sensor to the master, the master then calculates the LED’s which have to be lit up.
The user is able to control the panel through a little ‘control-box’, it lets the user choose the mode and the color.